Saturday, December 22, 2012

The Countdown Has Really Begun!

Jeff and I drove from San Diego to Littleton on Wednesday. 18 hours in the car is always an adventure and we were very thankful that the roads weren't as bad (snow/ice/poor visibility/etc) as they were predicted to be because driving through the Rocky Mountains at 10pm in a blizzard is never fun. Trust me, I've done it. 

And over the last few days we've been running around like chickens with our heads cut off trying to get everything finished for both Christmas and the wedding. I cannot believe that Christmas is in 3 days and our wedding is ONE WEEK from today!

Jeff is off in the woods having "mountain man time" with his groomsmen and some other awesome guys for his bachelor party this weekend and I'm here in town constantly working on something. Here's a bit of what the last few days have consisted of. 


+ Instagram hashtag for the wedding!
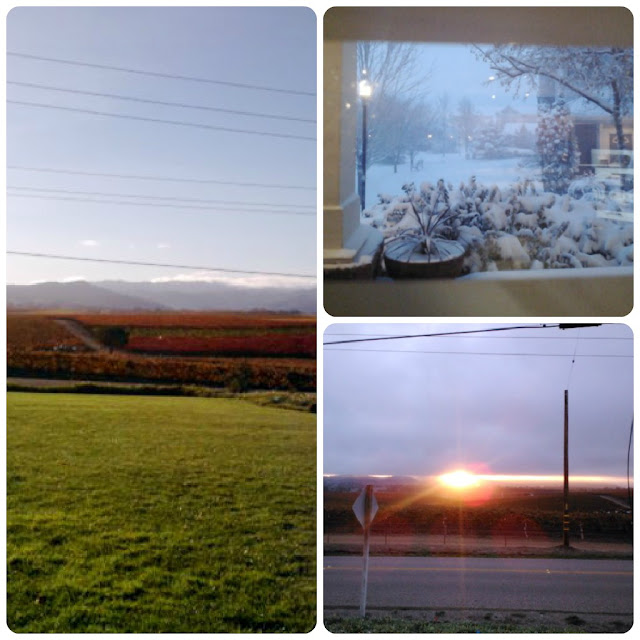
+ Middle of nowhere Utah and a gorgeous sunset
+ Our monogramed aisle runner I made last night
+ A Christmas tradition of chocolate dipped pretzels

We've also:
+ Ordered our cutting cake
+ Picked up tons of vases and glassware for our centerpieces
+ Got our marriage license
+ Had my final dress fitting with all the accessories
+ Made decorations for the aisle chairs at the ceremony
+ Finished all our Christmas shopping
+ Wrapped all wedding party gifts
+ Sent in our final wedding counts to the caterer
+ Made the final seating chart that Jeff just needs to approve

There are still tons of other smaller things to take care of at some point between now and either Christmas or the wedding but I'm very happy with all we've been able to get done so far. Plus the week after Christmas is going to be filled with festivities like my bachelorette party, trial hair appointment and rehearsal. I apologize if there's not much updating going on around here in the next week or so but I'm sure you understand! 

And you can always follow me on Instagram @jaymeeryn and search our hashtag too!

Merry Christmas to everyone.

Thursday, December 6, 2012

Tying the Knot: The List is Getting Shorter!

+ Pick a wedding date
+ Choose your wedding party
+ Find a ceremony site
+ Choose a ceremony officiant
+ Plan the ceremony details (unity, readings, etc)
I am loving the unique and personal touches we've come up with and I can't wait to share them with you soon.
+ Find a reception site
+ Plan the guest list
+ Plan the VIPs/toasts for the reception
In the casual manner that a lot of our wedding is taking on we aren't going overboard with planning these types of things specifically. We assume our parents are going to give toasts at some point (rehearsal/reception/etc) as well as the MaidofHonor/BestMan speaches but we will go with the flow for these.

+ Pick a caterer
+ Decide on a menu
+ Find a florist
+ Find a photographer
+ Find a DJ/Band
+ Find a bakery
+ Decide on a cutting cake
+ Find salon/hairstylist/make-up artist

+ Have an engagement party
+ Take engagement pictures
+ Have a bridal shower
+ Have bachelor/bachelorette parties
+ Plan rehearsal dinner

 
+Find wedding dress
+ Decide on a veil
+ Find bridal shoes
+ Pick other accessories
+ Decide on Old/New/Borrowed/Blue traditions
+ Pick out bridesmaid dresses
+ Pick out tuxes
+ Decide on wedding bands

+ Have dress fittings and alterations
+ Buy wedding party gifts
All done and even in Colorado already. Just need to wrap and deliver!
+ Buy gifts for our parents
I love the pieces we picked out. They don't scream WEDDING but I hope they serve as great memories of our special day.
+ Buy gifts for each other
+ Plan special dances & "must have" list of songs
A lot of our special moments were easy to put songs to and I have been constantly adding "must play" songs to the growing list. I'm having a bit of trouble with the ceremony part of this step but know a phone call with our DJ will clear a lot of it up.
+ Figure out day-of transportation
This process was seriously so stressful and it definitely shouldn't have been. Between harassing phone calls from a company to round & round conversations with others I'm so glad this is finished!
+ Set up wedding registry
+ Book night-of hotel room
I had grand plans of staying somewhere luxurious but we ended up going with the same hotel where our block of rooms are. It's easy, close to the venue and might be free.
+ Book Block of Hotel Rooms
+ Book honeymoon
+ Place flower order
+ Place bakery order
+ Send Save The Dates
+ Design Invitations
+ Send Invitations
+ Make guest book
+ Design wedding website
+ Decide on wedding favors
+ Create slideshow
+ Make ceremony programs
+ Make escort/place cards
+ Write vows
I know I personally am finished with mine and I believe J is done as well. We both need to print/write them out to have with us on the big day but that's easy!
+ Get marriage license

46/52
Only 6 more major things that need to be taken care of. Minus making sure everyone is paid and the last minute details we feel like adding but aren't essential items. I'm definitely feeling good and with only 23 days left the excitement is growing!

Monday, December 3, 2012

Book of Lists: v1

I decided about a month ago to start participating in the Book of Lists project. 
And about a month ago I was supposed to pick out a little notebook of sorts, something to call mine, something to decorate all cute and fill with lists (if that wasn't obvious) and I was supposed to blog about said-notebook.

And well, it's taken me that long to get things together around here. 


Life has just quite frankly gotten in the way, until today. Thanks to Keri for her tweet this morning because it knocked some sense into me that today is in fact December 3rd which means List #1.


 December 3, 2012: Wish List


Also, if you've never used these pens before you need to go get them now! Super fine tip, won't bleed, pretty colors. An office-supply-lover's dream. 


Next month's topic: Looking Forward
I'm playing along with the guidance of Kathleen from Kapachino. You should too!

Thursday, November 22, 2012

Thankful v2

I am thankful for...

[+] A home that is ours. One that keeps us safe and warm. A roof over our heads. A place to create memories and relax with my little family. 

[+] A job that constantly challenges me with a company I take a lot of pride in. I have some pretty great coworkers, enjoy what I do most of the time and feel like I'm really contributing. 

[+] Our big, snuggly, perfectly sweet Ollie. Our lives are forever changed because of him and I couldn't imagine life without him. He's become pretty dang spoiled lately but I wouldn't have it any other way. 


[+] J and my health. I've seen too much sickness both serious and not-so-serious in my time preparing for medical school and I cannot imagine the struggle that some people go through with continuous, significant health problems.

[+] Family. In all meanings of the word. My immediate family sometimes has our issues but I would do a lot for them and hope they would for me too. I'm also beyond lucky to be gaining such an amazing family as my in-laws and not only J's immediate family but his cousins, aunts and uncles, grandparents, the whole bunch.

[+] Two amazing states that I can call home. California weather is pretty dang awesome throughout the year and being able to head to the cold in Colorado is definitely icing on the cake.

[+] My fiance. These last few months have been very stressful for both of us in different ways and to know that we are there to support each other 100% brings me so much joy. Plus he sure does bring a smile to my face. I would do anything for this man and I cannot wait to be his wife.


[+] That our wedding is in 36 short days. The time of our engagement has flown by and while it seems that my to-do list is constantly growing, I know that if nothing else goes right on that day walking away as J's wife and having him as my husband will be a success.

Thursday, November 15, 2012

Tying the Knot: Our Wedding Party

There's something about our wedding party that just brings so much joy to my life and a huge smile to my face. J and I are beyond blessed to have these amazing people in our lives who are honoring us by standing by our sides on one of the biggest days of our life together.

Seriously, these eight are the best.

They are our best friends. Some we've known for what seems like forever while others are newer friends. We've shared endless memories J and I both hold dear to our hearts and I couldn't have dreamt of better people to share our day with us.

So here's a peak at our crazy, fun, loving, amazing, fantastic wedding party. Everyone in these pictures is part of our big day and each picture floods me with memories I'll cherish forever.


I'm predicting that our wedding is going to be a blast. These eight wouldn't allow it to be any different!

Monday, November 5, 2012

Tying the Knot: Our Formal Invites

Here is a the final product of our wedding invitations! They are 100% made by me (with J's help of course) and I couldn't be happier with them. Simplicity, streamline and to the point was exactly what I wanted for our invites and that is exactly what they are. 

Now onto some details about how they were made and what I used. The layout was created using PicMonkey and the fonts are Veranda and Coneria Script. Once the design was set I used Microsoft Word to print on A6 size paper. Both sets of card stock (white and navy) were purchased from Paper Source. The white is A6 (4x6) and the navy is A7 (5x7). I used my HP Photosmart Printer at our house to print all the invites and details cards.


J helped me mount the wording card on the navy card stock using rubber cement and I tied navy ribbon around each. Our details card was printed on white card stock as well and cut to 3x4 inch size. These were slipped underneath the ribbon on the back of the invite. I designed our monogram, seen below, using PicMonkey as well and it was placed on the top of the details card as well as our ceremony program for some consistency. 


They were mailed in white A7 envelopes also from Paper Source. I used Powerpoint to print out all guests' addresses (approximately 1x3 inches in size) and used my Xyron machine to create stickers out of each address. These were centered on the outside of the envelopes and finally they were stamped with our return address on the back flap.

If you would like more details about how I actually made them (like a step by step tutorial) I would be happy to do that, just leave a comment or send me an email! Once I figured out what I was doing and what my vision was for our invites the process was really very simple.


Friday, November 2, 2012

Tying the Knot: DIY Garters

STOP! If your name starts with a J and you are my fiance, do not read any further! 

J wants to know nothing about what I will be wearing/look like/have on me the day of our wedding and that includes my garters. But I wanted to share the project anyways! 

When it comes to garters I have mixed feelings. I like the goofy, party side of them. The new husband retrieving it from under layers of dress. The superstition that who ever catches it is next in line down the aisle. But on the other hand it's not something that I feel the need to spend a bunch of money on or quite frankly, keep as a memento after the wedding is over. So basically I knew I wanted one, knew I wanted it to somehow reflect either our wedding or our style but knew that I wasn't going to spend a significant amount of money just to put in a box somewhere later. All these things meant it was the DIY route for this girl again.
I picked up some pretty lace, one thinner than the other to serve as our toss garter. I got 2 yards of each because it was on sale and I didn't have a plan for it quite yet as I wandered around the store. I also picked up some elastic and some pretty embellishments that I figured I would incorporate somehow.

Once I got home I decided on a plan. I cut the lace 4 inches shorter than how much I needed to go around my whole leg. This would allow for the elastic to be added and make it tight enough. Since I was going to embellish it I decided to make each garter double layered with lace to make it more sturdy.

Using scrap pieces of fabric I already had at home I hot glued some rosettes and added in my bits of sparkle and pearls. Then I got sewing. Again for stability purposes I took a small square of plain white cotton, folded it in half, and then in half again and slid it between the two layers of lace. Even though I was zig-zag stitching I wanted to make sure there was enough to "grab onto" for the stitches to hold.
Each end of both types of lace got a similar treatment and then I attached the elastic. I stitched it back and forth quite a few times on one end first. Then I took the "very meticulous" route and slid it up my leg to determine how much elastic I'd need for it to fit right. I apologize there's not a better explanation for this step but I was sort of making it up as I went along. Once I figured out how much elastic I needed I repeated the sewing on the other side.
Now I had a circle of lace that needed some pretties. Using the same plain cotton I cut a strip just slightly narrower (is that a word?) and placed it between the two pieces of lace. Since I was hot gluing my rosettes to the lace I wanted to make sure they stuck completely and avoid hot glue burns from it seeping between the lace. Then I placed the rosettes where I wanted them, added extra sparkle and ta-da!
Custom bridal garters. And yes, our wedding colors are ivory, white and navy so I threw in the touch of orange for J's love of the Denver Broncos. I'm sure he'll appreciate finding some navy and orange under there!

Another item checked off the list with under 60 days to go! 

Thursday, October 25, 2012

Currently [v3]

Basically this is a post for a few things that didn't deserve their own post but I had to share them with you anyways. I am currently loving.... 

>>> Starbucks Iced Americanos. I don't know why I never ordered one before but ever since, I just can't seem to get anything else. And since it doesn't quite feel like fall around these parts in sunny San Diego, I can go for something iced still. But believe me, when those red cups come out I'll sure be making a switch.


>>> OPI Wooden Shoe Like To Know It. I think it's the perfect fall color without being overly dark. It's a brownish purple with a little sparkle to it and the formula is fantastic. Two coats gets great coverage and they haven't chipped yet which is awesome for my nail-polish-hating nails.


>>> These amazing apple crisps. I made my first batch the other afternoon using a single apple. But silly me, who was I kidding. I gobbled them up that same night and had to make a larger batch again the next day. They're super simple and bake for long enough to make your house smell like apple pie without all the effort.

>>> TheKnotDOTcom. Seriously it's been my best friend since getting engaged and I'm constantly finding new tools and ideas and endless amounts of inspiration from that site. I highly recommend any bride-to-be to check out all that it has to offer. For example, my most recent use has been related to our guest list. I made an excel file with everyone invited, imported it to the website and have been able to track our online-RSVPs as well as easily create seating plans with an interactive screen to show table placements and such. It's been awesome for this DIY/OCD bride like me.

So tell me, what are you loving this month? Anything you think I'd love too?

Monday, October 22, 2012

A Tribute to My Mr.

Today marks 68 days until our wedding and as the days and the months quickly pass by I just can't seem to stop myself from thinking how blessed I am to be marrying this man. And quite frankly, I hope I never stop feeling lucky, feeling loved, feeling like I'm in exactly the relationship I dreamt of my entire life.
 
Life is definitely not bubble gum and roses every moment but it's because of that fact, because there will be moments when I'm angry, moments when we fight, moments when things don't go my or our way, that make our love so special. I cannot wait until the day that I get to call J my husband but even more than that, I can't wait to live my life together with him because I know it is exactly where I need to be.
 
 
I love you babe, and I can't wait to be your wife!

Tuesday, October 16, 2012

Tying the Knot: Wedding Dress Hanger

I'm sure you've all seen the hangers floating around Pinterest and the webs in general that are custom made to hold your wedding dress or to give as gifts to your bridal party. Whether it be curved wire or painted wood the options seemed to be endless and quite frankly, something I didn't feel like spending a bunch of money on. So I decided to DIY my own version.
 
After a quick trip to IKEA for a set of white wood hangers that cost me less than $1 each the process was super simple and super easy. Not to mention the perfect afternoon activity to go along with trashy TV that the fiance wouldn't watch with me :-) 
[1] Gather all supplies: hanger, printer paper, pencil, permanent marker, bobby-pin/credit card/something with an edge. I printed my lettering in the font and size that would fit the hanger the right way and cut it down to size.
[2] On the wrong/back side of the paper, trace your letters in pencil making sure to completely cover all areas and use enough lead.
[3] Tape the paper right side up so the pencil markings are touching the wood.
[4] Gently but throughly rub over the letters to transfer the pencil marks onto the wood. This is where I used a bobby-pin (only because I had one sitting on the table where I was working) but anything will work for this step. Carefully lift one edge to make sure all letters have transfered.
[5] This is how it should look. Tough to see I know but you can tell that the pencil marks have stayed on the wood.
[6] Carefully trace over the pencil with your permanent marker making sure to avoid smudges.

And it's as easy as that! The other side of my hanger says "Mrs. New-last-name" and then obviously this is our wedding date. I love how it turned out and the fact that it was cheap. Sure the professional ones might have the edge of well... professionalism but hey, I much prefer to do these types of things myself.
 
Another item crossed off the check-list! What have you accomplished this week?

Friday, October 12, 2012

We Sure Are Cute

As a project for the wedding I'm incorporating pictures of J and I growing up and I sometimes can't get enough of them. I love thinking about all the memories that I have from pictures of me and I absolutely can't get over how much of a cutie my fiance was. (And still is, don't worry babe.)

I'll share more of the project later once it's finished but here's a sneak peak. 
 
 
Both of these pictures were taken in 1991.
Happy Friday! I'm spending the entire weekend with this guy and I can't wait!

Thursday, October 11, 2012

Tying the Knot: Our Guest Book

I originally posted about our guest book as a Guest Post for Syndal while she was getting married to the love of her life but for anyone who missed it (and to keep my own blog up to date about everything going on with my own wedding) I thought I'd share it here too!


The Guest Book
After attending the wedding of some close friends, I knew almost immediately that I would want to create a photobook using our engagement pictures to have for our guests to sign and send us words of love and encouragement. Then I got our pictures from our photographer and fell in love with them. I literally couldn't keep myself from designing said-book ASAP and am so, so pleased with how it turned out.

I read many reviews about different online sites to use for projects like this taking into account price, book size, customer reviews, return/exchange policies incase something went wrong, coupons. You name it and I researched it. I knew that this book would be something we had for the rest of our lives and I wanted it to be perfect.

With all that said, I happily chose MyPublisher and I am absolutely thrilled with the results. The minimum size for photobooks from them is 20 pages and that's how many we ended up having. I didn't want to spend extra money (I'm cheap, what can I say) and knew it didn't have to be very long to get the job done. The cover is solid black, linen finish and it's gorgeous. Inside the front cover I picked a textured gray and all their books come with a vellum overlay before the first page.
They have tons of layouts to choose from depending on the number of pictures you want per page and how much physical space you want the pictures to take up. The quality of the photos is absolutely stunning, seriously these pictures do not do them justice. Even the black & whites turned out amazing.

I specifically designed some pages to have more white spaces and some to have less and emphasize the pictures instead. We're not having a huge wedding and with families/couples I estimated that we'd have enough writing room even if it wasn't on every page. The layouts allowed you to pick one of their standards and then customize them to exactly your liking. (ie photo dimensions, location on page, etc)

To create a little uniformity to the book I repeated some of the layouts on different pages and I loved how their site was super user friendly. One of the things I liked best was that from running list of pictures to be used, ones that were placed in layouts no longer appeared. We had over 100 photos from our photographer and some were extremely similar with just minor changes in expression/angle/etc. This made it super easy to be sure pictures weren't repeated and to eliminate ones that didn't make the cut.
I picked the standard pages (versus the lay flat pages) because I was worried with how the center binding would be affected. I had read that some of the lay flat pages messed with the alignment of pictures and ended up cutting off essential parts. And I definitely didn't want that! Of all the pages I only had one (see below) that was slightly cut off and too close to the center. But I'm almost positive that was my user error and not a printing problem.
The end of the book is a solid white page (perfect since we're using it as a guestbook) followed by a little company logo and an odd barcode. I was sorta confused to see that but thankfully it's small and in the back. There's also another vellum sheet and the back cover has the same gray texture as the front.
I am by no means associated with MyPublisher other than the fact that I am a very pleased customer. They did an amazing job with the printing, putting the book together was a breeze and I was even able to use a Buy One Get One Free code and give my mom a copy of our book to keep for herself. I cannot wait for this to be displayed at our wedding and have it for the rest of our lives to look back on such an important day. 

All images taken by me, engagement pictures taken by Josh Barrett of Ignite Images

Wednesday, October 10, 2012

Tying the Knot: Checklist Update

Things have been so hectic around here ever since we got back from vacation that I seriously don't know how it's the second week in October already! I've really been feeling like there aren't enough days in the week and hours in a day to accomplish everything I want/need to get done. Between planning a wedding, applying to med school again, working, trying to keep up a house and spend time with my fiance the days are just slipping by. But thankfully we've gotten a lot done on the wedding front recently so check it out. 


+ Pick a wedding date
+ Choose your wedding party
+ Find a ceremony site
+ Choose a ceremony officiant
+ Plan the ceremony details (unity, readings, etc)
+ Find a reception site
+ Plan the guest list
+ Plan the VIPs/toasts for the reception

+ Pick a caterer
+ Decide on a menu
+ Find a florist
+ Find a photographer
+ Find a DJ/Band
After a bit of trouble we have finally found someone we like who isn't going to flake on us and isn't too expensive!
+ Find a bakery
+ Decide on a cutting cake
+ Find salon/hairstylist/make-up artist

+ Have an engagement party
+ Take engagement pictures
+ Have a bridal shower
+ Have bachelor/bachelorette parties
+ Plan rehearsal dinner
A huge thank-you is in order to J's mom for taking on this task and running with it. Such a huge relief and we're so grateful!

+Find wedding dress
+ Decide on a veil
Notice that it says 'Decide'. J wants to know absolutely nothing when it comes to me (which I love) so even a yes or no about a veil is out of the question.
+ Find bridal shoes
+ Pick other accessories
+ Decide on Old/New/Borrowed/Blue traditions
Most of these were easy like my dress & shoes and certain pieces of jewelry and my favorite is a blue OPI nail polish for my toes that has my new last name in the title!
+ Pick out bridesmaid dresses
+ Pick out tuxes
+ Decide on wedding bands

 
+ Have dress fittings and alterations
+ Buy wedding party gifts
Part way finished but not giving any details yet!
+ Buy gifts for our parents
+ Buy gifts for each other
+ Plan special dances & "must have" list of songs
+ Figure out day-of transportation
+ Set up wedding registry
We've opted for a more modern take on a registry where it's specifically tied to our honeymoon instead.
+ Book night-of hotel room
+ Book Block of Hotel Rooms
Done and done!
+ Book honeymoon
+ Place flower order
Can't wait to see what our florist comes up with since I've given a bit of freedom for these.
+ Place bakery order
Nothing Bundt Cakes bundtinis for everyone!
+ Send Save The Dates
+ Design Invitations
+ Send Invitations
This is happening this afternoon once I'm done with work! I love how they turned out!
+ Make guest book
+ Design wedding website
+ Decide on wedding favors
+ Create slideshow
And I cry every time I watch it. But more importantly, does anyone know how to burn it to a DVD with a Mac? Help a future-bride!
+ Make ceremony programs
+ Make escort/place cards
We decided on a multi-picture frame where each table will be listed with their appropriate guests instead of individually  making one for each person. 
+ Write vows
+ Get marriage license

37/50 52
Over 70% with a little under 3 months left!

But seriously, who can teach me how to burn a DVD? Ha!
Happy Wednesday!

Wednesday, September 26, 2012

Vacation Time: Fun on the Lake

Our trip to Lake Powell was FULL of activity! I woke up sore every day from doing something physical the day before, was covered in bumps and bruises and even tried a few new things I never thought I'd do. Being in the water with great people definitely made this trip amazing.
 
Take a look at what we were up to!
 Trying not to sink in the knee deep mud while flexing their muscles //
Boy do I love this man // Showers in the lake // Playing with fire
 J slalom skiing // and me skiing on two 
 The Bud Bullet tube // Riding the wake before he smacks his face on the water //
I got owned tubing and yes that's me flying off the back // two great friends
 Four adult men on the alien tube // It spins like a top as you ride //
Which leads to horrible crashes and yes those are J's legs
The brilliant idea of skiing WITH the Bud Bullet // He was so proud of himeself
Destroying friendship-trees with rocks // Starfishing to scare the Shmountain Shlions // 
A couple's wander into the woods // Dressed up for Western Night
Impulse cliff jumping // Spending awesome time with some really amazing people

We all made so many good memories during the five days we spent on the lake. And while I can't say it was my all-time favorite vacation (I prefer real showers and not being attacked by bats) I really enjoyed every minute of this trip. We planned our trip to Lake Powell over 18 months ago and I can't believe it's already done! Until next time Powell!

Monday, September 24, 2012

Vacation Time: Cathedral in the Desert

One of the most amazing parts of Lake Powell are the canyons. There are endless places to explore and I was never disappointed with the gorgeous places we saw. The best though, by far, was Cathedral in the Desert. 
 Slipped the speed boat through an almost invisible crack in this huge wall of rock and it opened up into one of the most beautiful parts of the whole lake. 


Shallow pools. Waterfalls. Cold sand and warm waters. Sheer rock faces with history right in them. Unfortunately because the water level was down about 6-8 feet and we all couldn't spiderman up a rock face like one of our friends, we weren't able to do the hike that takes you back into the canyon even further. 

Still, the beauty of what we did see was more than enough. 

LinkWithin

Related Posts Plugin for WordPress, Blogger...

Labels

101 List 30 days 365 Project anniversary Antigua apartment artist award Baby H Baby H-2 backyard beach bedroom Betty Crocker birth story birthday Blog Sale book of lists books breakfast breastfeeding bride and groom bridesmaids broken Broncos busy cake camera cards celebration ceremony changes Christmas cleaning clothes coffee Colorado conversations cooking country covergirl crafts currently dance Day in the life Dear Monday decorating dessert details DIY dress drink driving engagement Essie etsy exercise fall family flowers food FOTD friends fruit frustrated fun GBU gifts goals graduation groomsmen growing up GTKY hair happy hard work Hawaii hiking holidays holidays. home homeowners honeymoon hope hospice husband and wife Ireland job Lake Powell laughs life life and death life with Mark life with Patrick link-up list LOAP Look what I made love make-up Mark Jameson mark says MCAT med school memory men mom months of Mark months of Patrick motivation moving music My Creations nails Nook numbers nursery Ollie OOTD OPI outdoors paint painting party perfection pho phone photos pictures Piggy Polish Pinterest planning politics pregnancy puppy purse rain random recipes relationships relaxation relieved residency ring Ring Warming sad San Diego school sewing shoes shopping shower sick sketchbook slideshow smile spring spring break stress studying summer surprise swap swim T2T Tail Wagging Tuesday talking tan Target tattoo thankful things I heart tired tradition vacation Valentines video Villa Parker visitors VOTMC weather wedding weekend whole30 winter Wordless Wednesday work work out yoga