Showing posts with label gifts. Show all posts

Monday, February 11, 2013

Birthday Celebration Recap

I was a horrible blogger this weekend and didn't write out my posts for this week so that means that instead of another Wedding Recap post I'm here with a mini peak into my birthday celebration from last week.

Birthdays are always so much fun for me. I love my own birthday obviously but I also love other people's birthdays too. It's a day exclusively for that one person and it's the perfect day to do something over the top, extra special, full of love. And that is exactly what my birthday was for me.

I am extremely blessed to have such an awesome husband who really helps celebrate my birthday especially when we have no family around. He knows how to make my day feel special and I am thankful for him. And even better, I can't wait until next year where I'll have a birthday in Colorado, near my family, for the first time in 6 years! My mom made sure to tell me she'll be baking me a cake!

But anyways, this years birthday celebration consisted of:

[+] Chocolate Oreo Cupcakes from my coworkers
[+] A day when I left work a little early
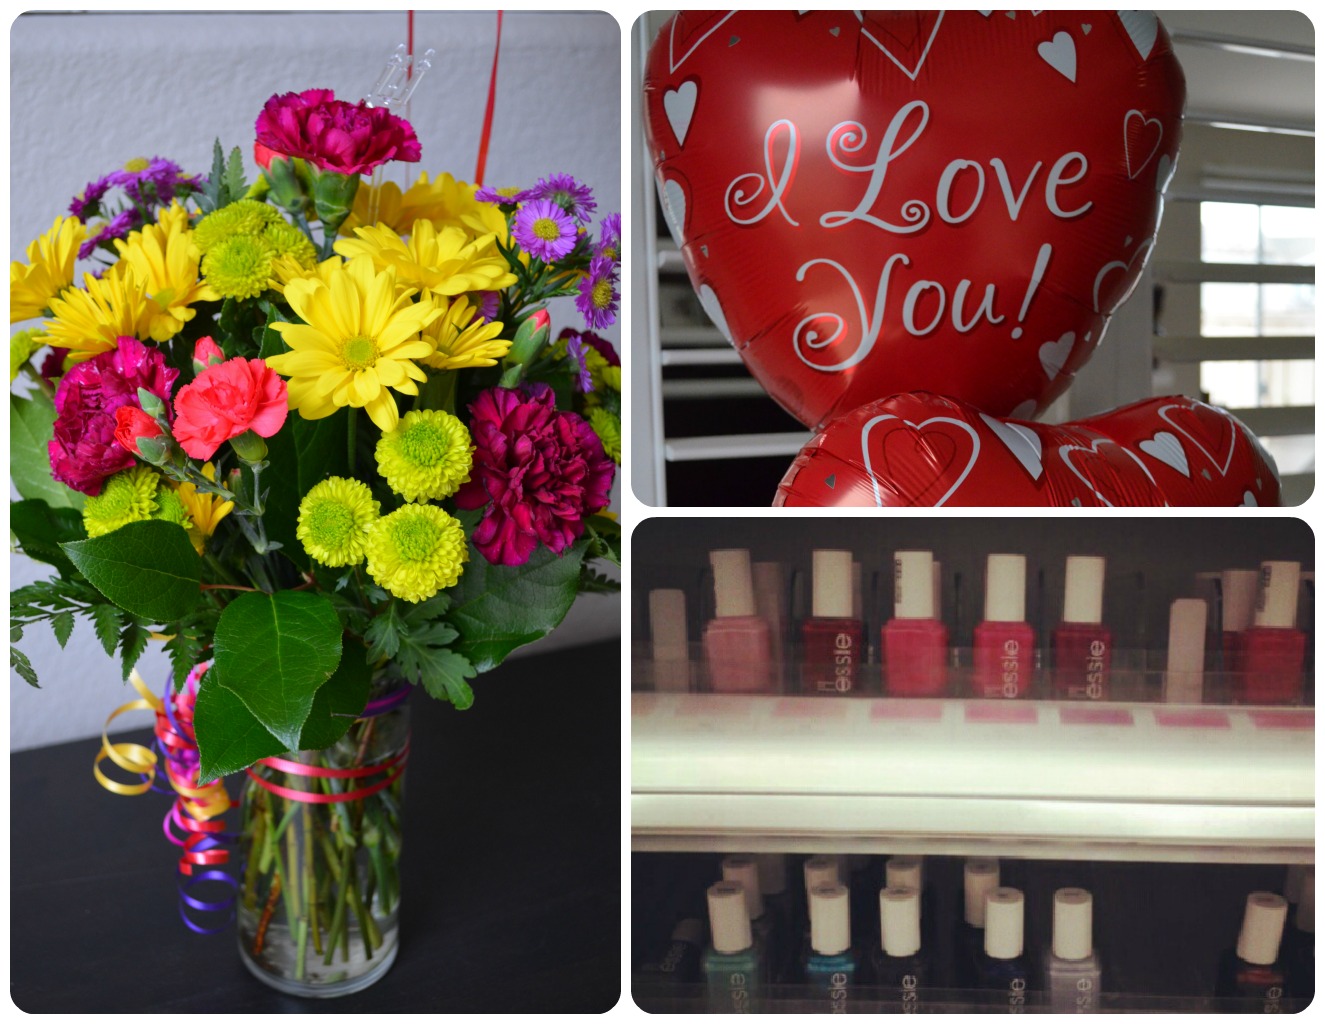
[+] My first ever flower delivery. Yes, ever! My husband is so sweet!
[+]  A mini shopping trip with birthday money to Target complete with a new Essie polish and polka-dot cardigan.
[+] New Athleta workout gear and some Starubucks Bucks from my momma. She knows me so well.


[+] Gucci Guilty perfume from my Hubs!
[+] A delicious Taco Tuesday dinner out complete with a strawberry margarita.
[+] Girl scout cookies and snuggling on the couch with my main man and our pup.

It was the perfect day, and perfect week really and I am so thankful to be starting off this 24th year of life with so many things to look forward to in the coming months and year. Although it already feels weird that my next birthday is 25! How am I getting close to that?  

Wednesday, August 8, 2012

Tying the Knot: Bridal Shower

This past Saturday while J and I were home in Colorado, two of my favorite ladies did me the honor of throwing me a bridal shower. I'll worn you that this is a picture loaded post...

My momma and I // The fabulous ladies who threw my shower, they're like my pseudo-aunts // Great friends from high school
Some of my all-time favorite appetizers // Adorably decorated cookies // The most delicious red velvet cupcakes of.all.time. I'm serious.
 Playing Games // "Fact or Fiction" and making words with the letters from my future new name // I couldn't play so I watched and laughed!
 Beautiful decor all around // Held in one of the hosts backyard, so pretty
Lavender bouquets as favors // Guests all brought a card with their favorite recipe // Seriously these flowers were so much more gorgeous than these pictures really show

 So blessed to receive such awesome gifts // Registered at Crate & Barrel // Little sister stepping in keeping track of gifts for me
 Apron from my future-aunt says "When I said 'I do' I didn't mean DISHES" // That box had an ice cream maker in it, so excited! // My future sister-in-law collecting bows (and balloons apparently) for the rehersal
My little family! // One of my greatest friends // My new big family!

Saturday night was one of the best parts of being home this trip because it made me realize how lucky I am to have these people in my life. I could not express how thankful I am for such a perfect afternoon and for such amazing women!


Monday, December 5, 2011

Nail Polish Swap!


I'm sure you know Tara of Fabulous But Evil
And if you don't, then you must go to her blog RIGHT NOW!
Okay, well actually after you check out the rest of this post....

So.... Tara and Celia hosted a Nail Polish Swap recently 
and are doing a link-up today to show off what everyone received. 
I am so so happy with everything that my swap partner Lauren sent me. 

 1. Essie Silken Cord: 
The perfect red for the holiday season
2. Essie Topless & Barefoot: 
An amazing nude/slight baby pink
3. Sally Hansen Strobe Light: 
Amazing pink/silver sparkles in different sizes with clear base
4. Orly Rage: 
Shimmery, metallic copper color
 I'm currently sporting Topless & Barefoot with an accent nail of Strobe Light.
I can't wait to use Silken Cord for Christmas and Rage seems like the perfect color for my toes! 
Thank you Tara and Celia for hosting the swap 
and a big thank you to Lauren for my amazing polishes!  

Monday, November 7, 2011

How is is November?

Unintentionally it seems as if I've taken a bit of a blogging-hiatus. I haven't been overly busy, nothing huge has happened in my life nor have I been out of internet/had a broken computer or anything like that. I guess you can say that I've just been enjoying my life away from the computer. Working, tutoring and spending quality time with my little family has been enough for me and I can't say that I'm not happy about it.

We rode our bikes to dinner and enjoyed beers at our new patio table. I've found my all-time favorite drink from The Bucks and Ollie and I spent Halloween at the beach. Nothing says October 31st like sand and sun!


We've been slowly making more updates to our house and I love every one of them. I went to IKEA and got us new bedding and made some custom art for over the bed. We also got custom artwork done by Jeff's talented cousin to hang in the dining room.


We went bowling on a Saturday afternoon, put together a lawn mower together and tried new recipes (all of which have been a success). I started making a Christmas gift list because I'm trying to go all handmade this year and I successfully made some of my first items on said-list. Who doesn't need a key fob, right? Mine coordinates lovely with the inside of my clutch!


Now that it's November (which, by the way, how did that come so quick?) I've started thinking about decorating for the Holidays already. I've been adding to our Christmas decor slowly but surely and every time I walk past the craft room and see all the red and green I get excited about winter. That plus  cuddling under blankets with spiked hot chocolate and a movie with my favorite man when it rains. (Because rain= winter here, in case you didn't know) 


This might be the most content I've been with life in a while. 
And that makes my heart soar. 

Friday, April 22, 2011

Mother's Day Gift Idea

For those of you who aren't thinking about it yet, Mother's Day is May 8th this year. And yes, that's only about two weeks away. I knew I would be making something for my momma this year since, well, that's what I do. Word of advice, mom's always love homemade :-)

While I was shopping at Target today, I had to wander past the photo albums and scrap book section just to get ideas and see if anything was on sale. Well I came across this (sorry for the photo quality, I only had my phone with me) and instantly thought, I can totally make that!

__________________________________________


So I did!

[1] Start by cutting three rectangles out of card stock. They hang over a 4 x 6 picture just slightly. My final measurements were 5 x 7 (around the outer edges) with a width of 3/4 in.

[2] Cut three solid pieces of tough card board measuring 5 x 7 also. I used an old shoe box.

[3] After picking out what scrap book paper you want to use, cut three 6 x 8 inch rectangles. I wanted mine to hang over on the front a total of 1/2 inch on both sides (this will make more sense in step 8) so I cut out 1/2in squares from each corner. If you want it to hang over more just add the amount to each side.

[4] Fold up the sides, almost like you're making a really shallow box. Make sure to really press down on the fold, I used the end of a ruler to make the edge crisp.

[5] Place the two other pieces you've cut out before inside your little box. Hot glue the card board piece (red color) to the scrapbook paper itself.

[6] Carefully folder over the scrapbook flaps and glue them to the card stock (white color).

[7] With an X-acto knife or razor blade carefully cut out an opening on one of the short sides so you can insert your picture later. This step is a little tricky, just be careful not to stick in the blade too deep. You only want the opening to be the size of your picture (4 inches), not the whole length of the side.

[8] I glued strips of a coordinating color paper to add a little dimension to the frame. This is why I only had to overlap 3/4 in (from step 3) because the green paper would cover the white edge. I covered the front with a thin layer of modge podge to make sure the edges were sealed and to give it a slightly glossy look. I also added a few rosettes to one of the frame to make it more "spring-y".

[9] Glue ribbon down the backs and separate the three however far you like. Form a simple loop at the top to hang it from and cut the ribbons so you don't see them on the bottom frame. I added a little message to my mom on the bottom frame so we'd be able to remember what this was for.

[10] Print a few pictures (of you, your siblings, your family, your mom) and you're finished! Mine will be going in the mail sometime soon. It's a perfect gift that can be hung easily because it's so light.
_________________________________________

Don't want to make one? You're in luck!
I will be adding these frames to my Blog Sale so go check it out!

Friday, January 14, 2011

Custom Napkin Rings

So this post is definitely a little delayed and for that I apologize but I have a good reason. I made these awesome napkin rings as gifts for my mom and J's mom for Christmas. I didn't want to spoil the surprise so I am just now doing a post on them because I had to share.
I got the idea from Amy @ Positively Splendid and I knew I had to make some myself. They were super easy but a little time consuming for me. She does a great tutorial so follow the link above to get all the specific details. I'll share the basics and also what I did differently.

Supplies Needed:
- Empty and clean pop cans (yes I call it pop, don't judge me)
- Scissors
- Hot glue
- Spray paint
- Scrap fabric
- Embellishment (buttons, beads, ribbon, fabric, etc)

The hardest (and most time consuming) part was definitely cutting the tops and bottoms off all the cans. I found it a lot easier to do all of one step completely before moving on. Ex I would trace all the petal pieces before I would cut any out and I would make sure I had all the petals for each flower before I started assembling them.

I didn't have a corner rounder so I put the curves onto the original cardboard piece I used to trace. That way they would all be the same. Be careful when you're hot gluing the pieces together, the metal is definitely a heat conductor and they got pretty warm sometimes. I used three coats of spray paint for each flower and one coat on the backs too. The backs weren't necessary but I didn't want to be able to see the aluminum on the other side.

I wanted mine to be simple so I used a little silver ribbon for under the flowers and a few simple plastic pearl beads. I made two sets of 8 and wrapped them in simple gift bags. I love how they turned out and I love how many ways you can make them unique and fit your decor.
If anyone ends up making some of these for themselves I'd love to hear about them so let me know.

Saturday, December 25, 2010

The Christmas Spirit

via WeHeartIt
When I woke up this morning I had to run Christmas presents by J's house for his family to open before my family came over for the celebrations. On the way home I decided,

"you know what, I'm going to get my mom and I a Starbucks drink treat because well... it's Christmas"

I pull up to the drive-thru (which was at least 10 cars long and growing, surprising to me for the holiday but whatever) order two Grande, Nonfat, Extra Hot, Caramel Brulee Lattes (yum) and am prepared to pay $8+ for coffee that neither of us really needed and I didn't really have the money to spend on.

I get to the window, stick my arm out of the car with my credit card in hand and the barista-lady says to me...

"the person in front of you paid for your order. Merry Christmas"

Made. My. Day!

That is what the Christmas spirit is truly about. It never ceases to amaze me how something so little from a complete stranger can mean so much and how there will always be people out there with warmth, kindness and giving in their hearts. I hope everyone was able to be blessed with an amazing celebration today filled with great company, joy and a little rejuvenation.


PS- I will be MIA from blog land until after the New Year. Tomorrow is going to be spent packing and running last minute errands before J and I leave on our amazingly perfect trip to Hawaii that I'm jumping out of my skin in excitement for! Eeeee! I will be enjoying Mai Tais on the beach, sight-seeing and spending some much needed quality time with the man in my life. Please have a happy (and safe) New Years and I'll be back in 2011 with lots to post about some homemade gifts I made for the holiday season I couldn't share until now.

via WeHeartIt

Merry Christmas and Happy New Years!

Saturday, November 27, 2010

Christmas Wish List

Now that it is officially Christmas season I thought it would be appropriate to start my Christmas Wish List. This is not all encompassing since many people always have other good ideas and there are probably a handful of things I want but have forgotten about. (I need to remember to write them down more often.) I would be very grateful to get any of the items on this list but frankly I don't expect any of them. Quality time with the special people in my life is way more important than any gift could be but for those of you in the giving spirit...
[1] A Camelback water bottle 25 oz (in purple, blue, forest, or lime) OR a Nalgene Wide-Mouth bottle 32 oz (in slate blue, purple, spring green, or clear) with a Sippy Lid in coordinating color

[2] Vera Bradley All-in-One Wristlet (in most patterns but my favorites are Poppy Fields, Baroque, Loves Me, Paprika, or Carnaby)

[3] Sephora by OPI Winter Mini Collection

[4] Barnes & Noble, Starbucks and/or Jo Ann Fabrics Gift Cards

[5] Philosophy Candy Cane bubble bath and shower gel

[6] Vintage Tees like these from Forever 21 or any other similar ones

[7] Carmex Moisture Plus (in Sheer Peach)


Thankfully everything on this list would be great as a repeat/multiple gift (since I'm horrible about remember who I told what.) A girl can never have too many tops or gift cards or beauty supplies right? I also hope this helps inspire some of your own lists or ideas for special people in your life too.

Happy Gifting!

LinkWithin

Related Posts Plugin for WordPress, Blogger...

Labels

101 List 30 days 365 Project anniversary Antigua apartment artist award Baby H Baby H-2 backyard beach bedroom Betty Crocker birth story birthday Blog Sale book of lists books breakfast breastfeeding bride and groom bridesmaids broken Broncos busy cake camera cards celebration ceremony changes Christmas cleaning clothes coffee Colorado conversations cooking country covergirl crafts currently dance Day in the life Dear Monday decorating dessert details DIY dress drink driving engagement Essie etsy exercise fall family flowers food FOTD friends fruit frustrated fun GBU gifts goals graduation groomsmen growing up GTKY hair happy hard work Hawaii hiking holidays holidays. home homeowners honeymoon hope hospice husband and wife Ireland job Lake Powell laughs life life and death life with Mark life with Patrick link-up list LOAP Look what I made love make-up Mark Jameson mark says MCAT med school memory men mom months of Mark months of Patrick motivation moving music My Creations nails Nook numbers nursery Ollie OOTD OPI outdoors paint painting party perfection pho phone photos pictures Piggy Polish Pinterest planning politics pregnancy puppy purse rain random recipes relationships relaxation relieved residency ring Ring Warming sad San Diego school sewing shoes shopping shower sick sketchbook slideshow smile spring spring break stress studying summer surprise swap swim T2T Tail Wagging Tuesday talking tan Target tattoo thankful things I heart tired tradition vacation Valentines video Villa Parker visitors VOTMC weather wedding weekend whole30 winter Wordless Wednesday work work out yoga